Within Engage, a campaign is a single event that, at its simplest, pulls an audience from your database and performs an action on that audience, e.g. send a communication. However, your marketing campaigns may consist of several linked campaigns that form a customer journey, e.g. sending customers a promotion code in one campaign and linking audiences to a choice of follow-up campaign depending on their response.
The customer journey planner tool allows you to build a flowchart of your linked campaigns and have a quick, visual reference for the structure of your marketing campaigns. You can then use this reference to check your campaigns are linked as expected and schedule them accordingly and view your campaign results for linked campaigns without going through each campaign individually.
Linking Engage campaigns
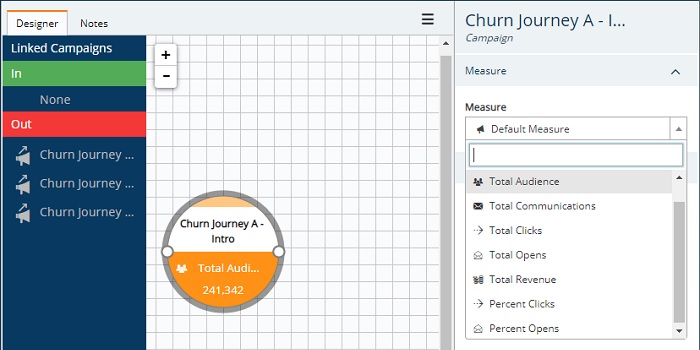
Before using the customer journey planner, ensure you have linked your campaigns using the link to and link from steps. When you drag a campaign onto the journey planner canvas, any linked campaigns not included in your customer journey are displayed in a list to the left of the canvas.
Adding campaigns to a customer journey
To build a new customer journey plan:
-
Click the create (+) icon and select customer journey planner from the list of available elements.
-
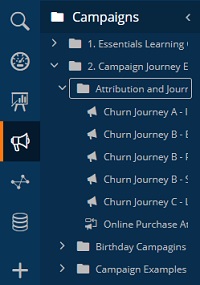
Click on the campaigns menu and navigate through your folders to locate the campaigns for your customer journey.
-
Drag-and-drop a campaign from your list onto the customer journey canvas.
-
The campaign will populate with a default measure. Click on a campaign and use the dropdown menu in the properties pane to change the measure, e.g. display the percentage of opens for that campaign.
-
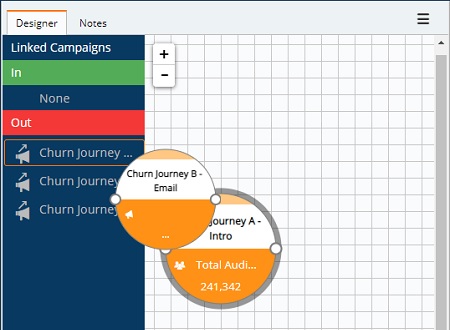
With the campaign selected, you will see a list of linked campaigns. Continue adding campaigns either by selecting from the campaign menu, as above, or by dragging-and-dropping from the list of linked campaigns.
-
As you add campaigns to the canvas, Engage will automatically connect the campaigns. They will also disappear from the linked campaign list, allowing you to see which campaigns still need to be added to the canvas.
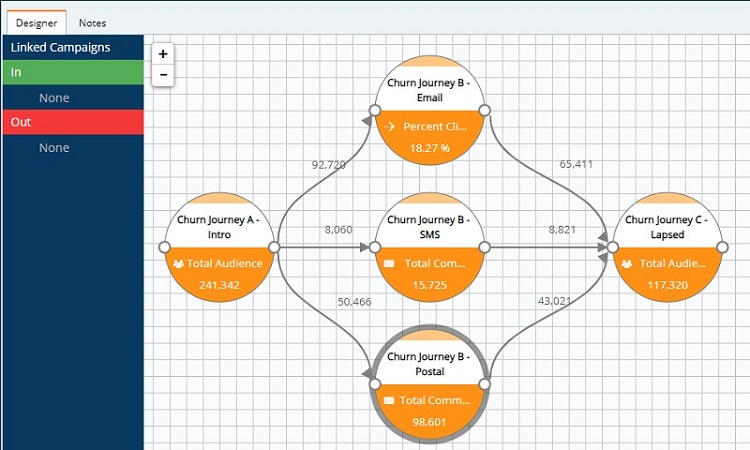
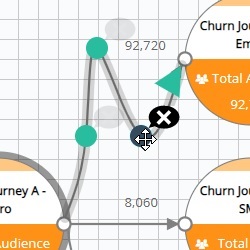
Note: you can change the positioning of the connecting lines by clicking anywhere along the line and dragging it to a new location. You can also add additional points to turn the line into a multi-point curve or delete points using the X icon.
With all your campaigns added to your customer journey canvas, you can check the flowchart against your intended marketing campaign and confirm its accuracy, returning to the campaign menu to add a campaign, adjust the scheduling of your campaigns, or link campaigns as required.